In vyb, we have powerful email automations built into the platform. Whenever someone first follows you or subscribes, you can automatically send them a message thanking them. You also have an invitation template that can be used when you upload contacts to your list.
Make sure to edit and personalize the automatic replies. These are your super fans; they want a genuine message from you. Add pictures, links, and most importantly, tell your story!!
Importantly, whenever someone uses your signup landing page, they are automatically made a follower and will receive your follower welcome message. Make that message count by editing the template.
Read this to learn more about the using the QR Code to build up your list at gigs:
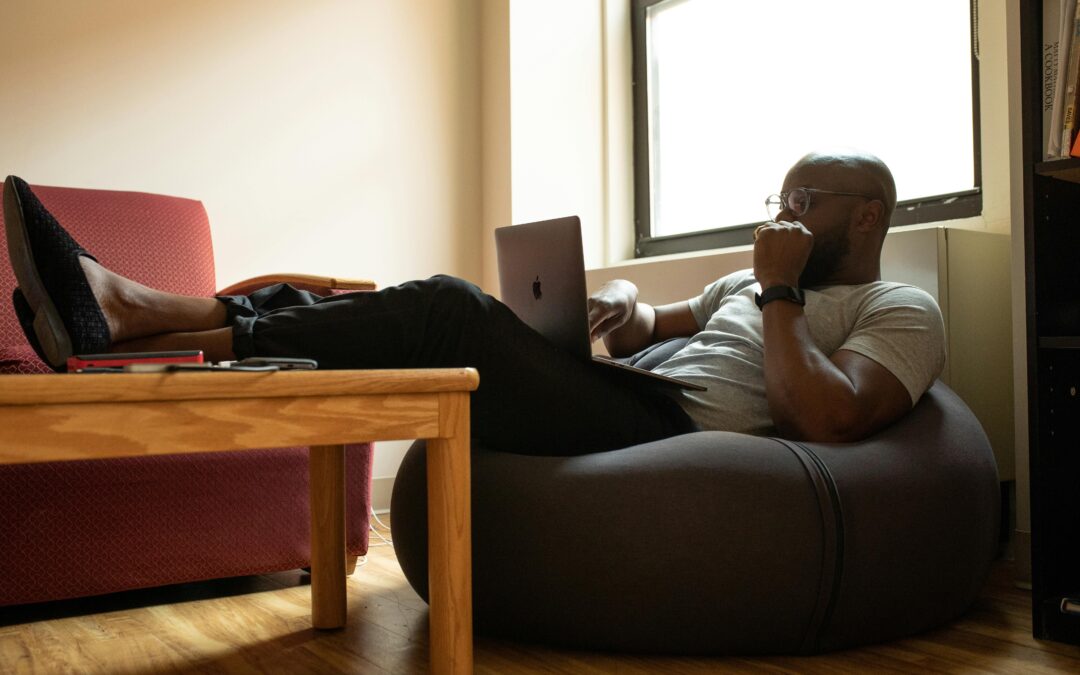
Social media is great, but you can’t talk directly to your audience. In fact, as you build a larger social following, each post reaches a smaller and smaller percentage of them. That’s the business of social media; while the allure is that a post will go viral, the truth is that they are going to charge you to reach your fans.
We have an easy solution for that: use vyb’s direct email tools.
Bypass the Algorithm. Talk to your Fans Directly.
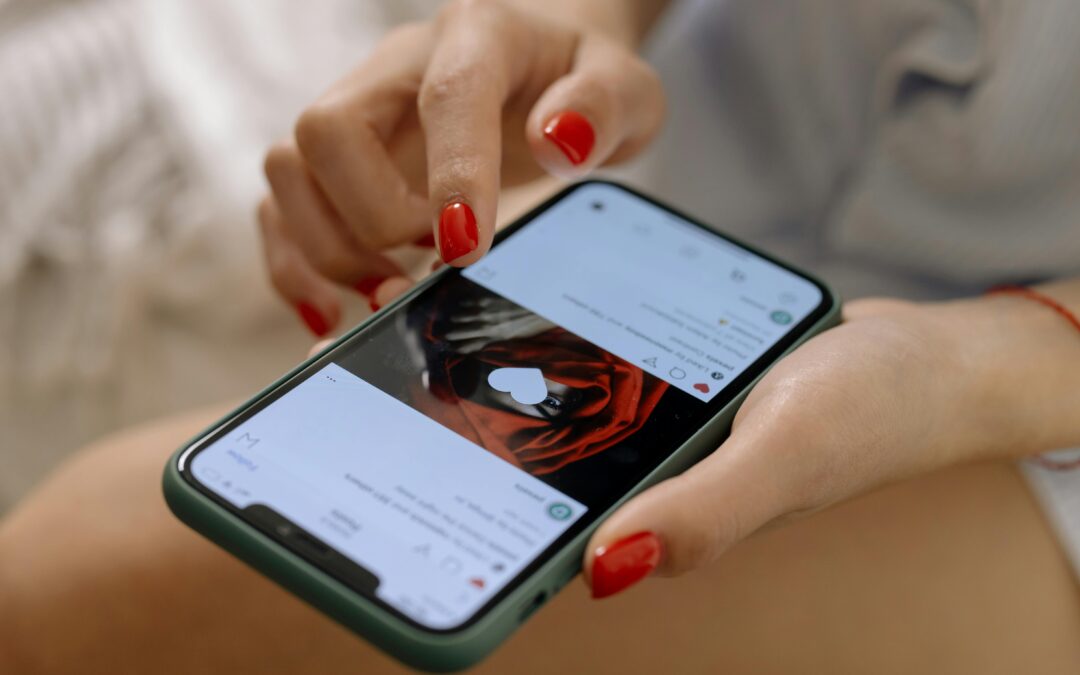
Use email to direct market to your fans. Social posts often reach only 2% of your followers. Fans will open emails 40% of the time; your dedicated fans will read them at a much higher rate!
For more tips, go here. Otherwise, either use vyb’s built in tools or your chosen link in bio service.
Use vyb’s Link in Bio to Connect Your Followers to Your Email Signup
Using vyb’s free Link In Bio Tool, you can easily drive your followers to your list
vyb’s Free Smart Link In Bio Tool automatically has a button that links to your email list signup.
You can just use this free service, add it to your profile, and start people to your list.
Don’t worry that only a small number of people join your list. They are your dedicated fans and the ones you want to build with.
For more information on setting up the free vyb Link in Bio – go here
Link your Email Signup in Your Existing Link In Bio Tool
If you have your own link in bio tool that you already like, simply navigate to Contacts Management in your artist dashboard and you can copy the list signup link.
Paste the Signup Link into your link in bio tool and your are ready to drive followers to your email list
Escape the Algorithm
Doesn’t matter if you use vyb’s free Link in Bio tool or your own; get off the social media treadmill by taking ownership of your fans.
Periodically remind followers to join your fan club
When you post content like new merch for sale on vyb, remind your followers that they can get to be the first to get notified by signing up for your fan club
Use the email list thoughtfully. Don’t spam out at people with tons of messages. Take the time to do storytelling.
Don’t just say that you have something new for sale, tell your fan club why this is unique and why they should care
Use your email list and you build up a loyal fan club that wants you to succeed.
As we’ve been working with different artists, we keep running into the headaches of keeping all their bio links updated. Since at vyb we have your email signup, music, merch, and everything else, we decided to make a free Link-in-Bio Tool that you can easily use. Like our free email list sign-up landing pages, we are making life easier to stay connected with yoru fans and give them an easy way to access everything you have.
Our tool will automatically populate based on your content on vyb. For example, as soon as you make your first merch item, the merch store button will automatically populate. Have any upcoming events? The event link button will auto-populate. No more having old, stale links.
The service is 100% free. Because we win when you win.
Here are the steps to configure and use this yourself.
Step 1. Navigate to Link-in-Bio on your Dashboard.
First click on “My Dashboard” and then click on “My Link in Bio”
You will see your current Link In Bio.
From here, you can copy the link to it or update it.
Next click “Update Link in Bio” button to start configuring it
Step 2. Select Social and Music Platforms
Now simply select all the social and other content sites that you want. These will show up as icons underneath your name in your bio for easy access
Note that you can also add a generic button to your Link in Bio if you want something to be more prominent.
Step 3. Edit URLs for the selected links and Your Image
Next enter in the URLs for each of your social and music platforms.
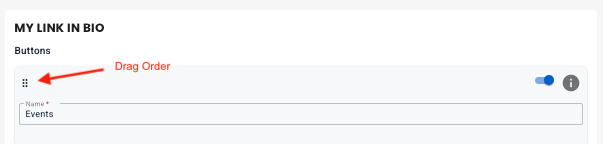
Now re-order these links by selecting their icon and dragging it.
On the right hand side you can replace the picture that shows up on the top of your Link in Bio
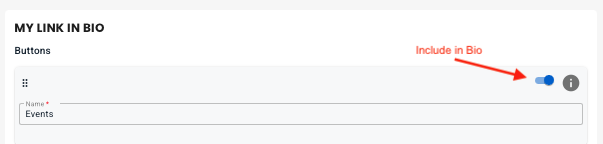
Step 4. Edit Buttons
We have pre-populated your Link In Bio with links to everything in your vyb account. You don’t need to manually add those at all. You can change the name, but realize that each of these is preset to always go to that service. For example Merch button will always go to your vyb merch store.
Now you can drag the buttons to re-order them.
Next, you can also include or exclude any default button, but know that if you don’t have any content in that area we will auto-hide it anyway. For example, until you post some GoLives your GoLive button will be hidden.
Step 5. Add Custom Buttons
Next, if you want to add your own custom buttons, click “+ Add Button” to add your own button. Give it a name and a URL
Step 6. Style Your Link-in-Bio
Now choose one of the preset themes at the top for an initial starting point.
Next you can change the overall change background color, your name text color and font
Edit the button styles, picking color, font and transparent or solid.
Finally, when you are done, click “Save” and you are done editing.
Step 7. Add your Link-in-Bio to your Instagram and other Platforms
Finally, it’s time to go live and use your new Linke-in-Bio! Back on the main Link-In-Bio dashboard page, copy the link.
Paste this into your Instagram and all other services to give a one stop place for your fans to get to you.
While most GoLives can be done as spur-of-the-moment recordings from your phone, sometimes you want to use footage you’ve already created and get some buzz for your fans. In vyb you can upload any footage and schedule when it will GoLive. This is especially great when you want to create some buzz but can’t do multiple GoLives, just take existing footage and schedule out your whole campaign. Now, this means that you can’t react to comments, so just remember that.
Here are some ideas:
Go back through your old videos, what do you have from significant moments in your career?
If you are recording a new album, take some videos during the recording process. Make some teaser videos and schedule them out to build hype to your release
Stitch together cool moments from your shows in a video montage showcasing the energy of your live performance.
To upload and schedule a GoLive, follow these simple steps:
Step 1. Navigate to GoLive in your Dashboard
Select “My GoLives” in your Dashboard
Step 2. Select “+ Upload GoLive Video”
Just like a regular GoLive, edit the title and Audience. Don’t stress too much on these, you can always change them from the Action menu under your GoLive dashboard.
Step 3. Set Your Source
For the source, you can set a Thumbnail image. This is purely optional.
Upload the video by selecting from files on your device.
Step 4. Schedule your GoLive
By default, your GoLive will publish immediately. You can change the date and time to anytime in the future.
Use this feature to upload multiple videos and schedule them out.
Once your are ready, press the “Upload GoLive” button.
Make changes if you need
That’s it! Make scheduled GoLives part of your campaign to build buzz with your fans.
If you want to change the date or title of the video, simply use the Action Menu next to the show.
GoLives are one of the most important things to use on vyb. GoLives are meant to be quick recordings that engage and excite your fans, content they only get in your vyb account. Regular GoLives keep your fans coming back to your account and let you speak to them directly.
You can be really strategic with your GoLives by choosing the audience. Make some content available for all fans, make some exclusive to your subscribers. Here are a couple of examples:
You are recording new music and you want to hype your audience for the upcoming release. Record a short GoLive that only plays the hook of a new song, then announce at the end that if people want to hear more, they need to subscribe. Now go record a longer playthrough of the song and make that exclusive to your subscribers.
You are on the road with a tour, do a quick GoLive backstage, intro some of the other people hanging out there.
Do a rig rundown of the gear you are using for a show or on a recording.
Take one of your popular songs and record an intro describing the songwriting or recording process.
Every Saturday at noon do a GoLive where you play a couple of songs in your rehearsal studio. Let fans in the chat pick the next song you play.
Tipping
Your fans can give you tips during the GoLive, so it can be a fun way to do regular engagements with them without all the setup of a ticketed event.
How to Do a GoLive in 6 Steps.
Here is how to record GoLives and start engaging your fans:
Step 1. Launch GoLive
From the top Launch menu, select GoLive
Step 2. Set the Title and Choose Audience
By default, vyb will use the date to set a title for your GoLive. You should edit this to something more descriptive for your fans.
Now set the Audience. This is who can watch this while you are live as well as well as view the video afterwards.
Not quite sure if you have the catchiest title, don’t stress!! The title and Audience can be edited anytime you want after you’ve recorded your GoLive, even years later
Step 3. Choose Stream Source
The easiest thing to do for stream source is to use your built-in webcam from a laptop or your phone. Don’t turn this into a big hassle, just grab your phone and do a quick video.
If you want to use a more sophisticated multi-camera setup, you can select Streaming Software to use OBS or other popular video software programs.
Step 4. Set Privacy Settings
Under privacy settings, you can choose if the recording is available afterwards. Usually we recommend that you do this, that way you build up your exclusiive content library.
Make your GoLive more interactive by letting fans chat with you during the GoLive.
Step 5. You are Ready to Record!
Now simply press “Start GoLive” and you are recording!
The chat will be on the sidebar, make sure to check that if you’ve let your fans know you are going live at a certain time.
After you are done, the GoLive video will show up in your profile in a few minutes.
Step 6. Generate a Preview
Your video may need a moment or two to show up. Refresh your screen and once it is there, you can generate your preview. If you want to use a frame in your video, then scrub the video to the right position and make note of the timestamp.
In the bottom right, click the Generate Preview select a thumbnail image for a preview
Select an image to act as a thumbnail image for your GoLive
Alternatively, you can change your video timestamp to the right position in your video.
Click the Generate Preview button and then hit “Save:
Fans can now see your GoLive!
Any of your followers and subscribers will be notified that you have done a new GoLive.
If you’ve made this GoLive open to all, then any fan can find the video in your profile and watch it.
Make Edits to Your GoLive
To change the title or audience of your GoLive, navigate to My GoLives in your dashboard and select “Edit” from the action menu.
To change the preview image, select “View detail” and then re-generate the preview.
On vyb, you can build and nurture your fan base by directly connecting with you Fans and Super Fans through exclusive content and unique experiences.
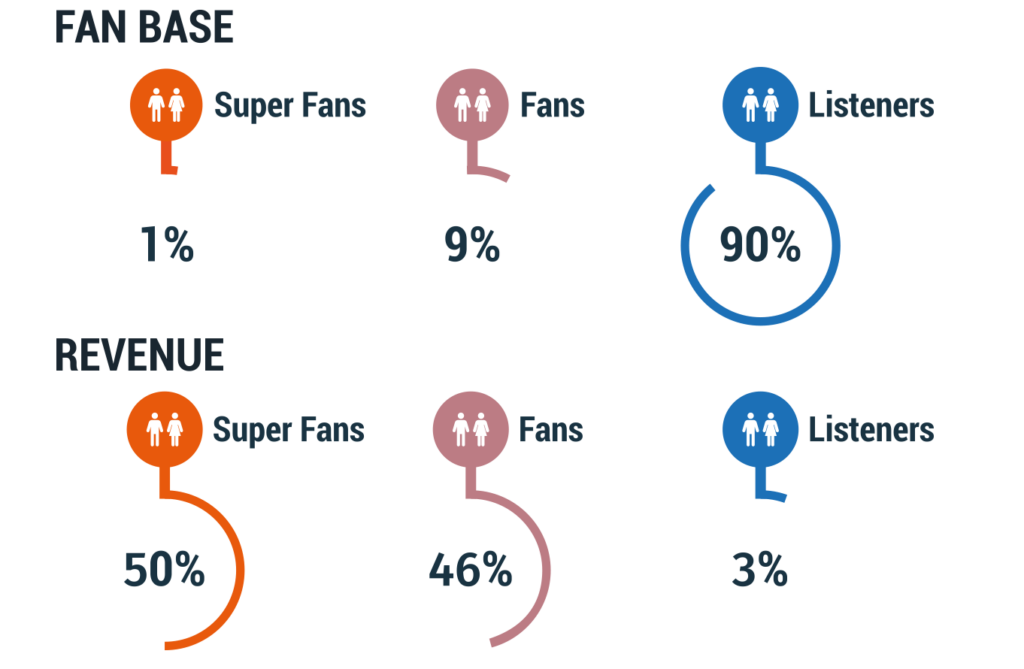
Understanding your Audience
Your Audience is made up of three main categories: Listeners, Fans and Super Fans. It seems crazy, but there is a stark difference between these three and the smallest number of Super Fans really drive your income.
Super Fans – always buys a concert ticket, always buys the merch.
Less than 1% of your Audience
Over 50% of your income
Fans – buys music, a concert ticket or merch once in awhile
Approximately 9% of your Audience
A little over 46% of your income
Listeners – casual fans that might hear you on streaming services or see you on social media
Over 90% of your Audience
Around 3% of your income
1% of your fan base provides HALF your income
Very importantly, because those Super Fans are your main drivers, you want to really nurture them. Think of how you give them special content and exclusives. They want the behind the scenes stuff, the raw unfinished song, the setup for the big show.
Audience Types in vyb
In vyb we have three types in your audience
Subscribers: these pay a monthly fee to get exclusives and discounts. For you, they provide regular income and a very targeted list to market everything new you do. You want to get your Super Fans signed up as Subscribers.
Followers: These fans have indicated they want to be kept up to date with what you are doing. When you add people to your email list on vyb they are automatically signed up as Followers.
Fans: people who don’t follow or subscribe, but just are on the platform. These people can still buy merch, they can still buy tickets. We want to convert these fans to Followers and Subscribers
Subscriber Exclusives
Here is a list of some of the things you can do for your Subscribers:
Events
Discounted Event Tickets – automatically we’ll apply the Subscriber discount that’s in your profile, but you can also manually set that to an even higher level.
Subscriber-only events – here are some example ideas
Set up a virtual event that is only available for Subscribers
Set up a meet and greet event only available for Subscribers
Subscriber-only event tiers
For example, make the VIP seating event tier only available to subscribers.
To learn how to do these features for your subscribers, see Setting up Events
Video purchases
In vyb you can upload and sell videos. When you do, you can make the purchase exclusive to subscribers.
Discounts on Merch. Subscribers automatically get the discount in your profile
Subscriber exclusive merch. You can set up a group of merch, called a Collection, to be exclusive to subscribers. To learn how to do this, see Merch Collections
GoLive
GoLives are quick videos that you can take, think behind the scenes content.
Nurture your Followers and Subscribers, increase your success
By using these tools and putting some things for all your audience, some for Followers, and some only for Subscribers, you will excite your Fans and Super Fans. True Fans love exclusives. They want to be in the in-club. make sure you are nurturing them and you will increase your success.